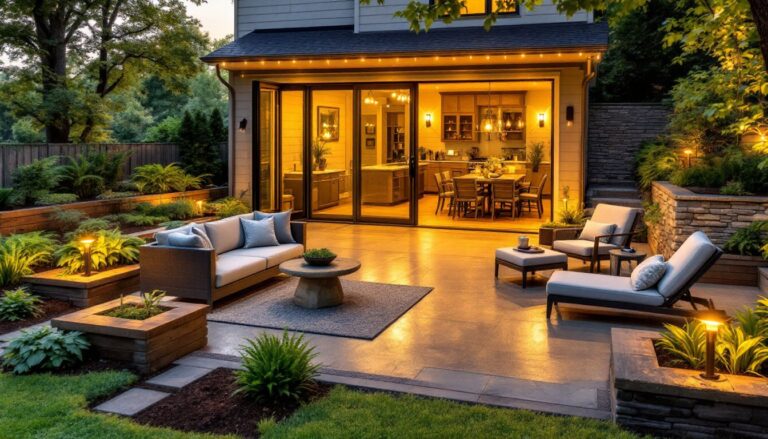
A wood stove becomes the focal point the moment it’s installed, flames dancing through glass, warmth radiating into the room. But the wall behind it? That’s often overlooked, rendered in plain drywall or ignored paint. An accent wall behind your wood stove is one of the easiest ways to anchor the entire room and make that stove installation feel intentional and designed. Whether you’re drawn to rustic brick, bold color, or clean modern paneling, the right backdrop transforms the hearth from a functional appliance into a true design statement. Here are seven proven accent wall ideas that work with any stove style and most home budgets.
Table of Contents
ToggleKey Takeaways
- An accent wall behind your wood stove anchors the room’s focal point and transforms the hearth from a functional appliance into a design statement.
- Brick and stone finishes offer authentic charm and handle heat beautifully, while faux brick veneer provides a budget-friendly DIY alternative.
- Bold paint colors like charcoal, navy, and deep green make wood stoves feel grounded, while neutral tones offer timeless elegance that appeals to future buyers.
- Shiplap and vertical paneling create casual farmhouse or modern aesthetics and are more DIY-friendly than masonry, though you must verify fire safety clearances from your stove manufacturer.
- Heat-resistant wallpaper and peel-and-stick options add personality without permanent commitment, but proper wall prep and priming are essential to prevent adhesive failure and peeling.
- Choose accent wall materials based on heat resistance, light absorption, and your room’s thermal conditions to ensure both longevity and the desired visual impact.
Why an Accent Wall Behind Your Wood Stove Works
Your wood stove already pulls the eye. Add an accent wall, and you’re telling the room exactly where to look, and why. A thoughtfully chosen backdrop amplifies that focal point instead of fighting it.
Accent walls behind stoves work for practical reasons, too. A darker or textured surface absorbs light and heat reflections, reducing glare from the firebox glass. Lighter neutrals, conversely, keep a small room from feeling cave-like. You’re also creating a defined thermal zone: that wall experiences heat from the stove, so choosing heat-resistant materials (brick, stone, certain paints) ensures longevity.
Design-wise, an accent wall lets you experiment without overcommitting. You’re not repainting the whole room: you’re testing a color, texture, or style in a contained space. If a deep charcoal or textured shiplap feels wrong after a month, you can pivot without major expense. Most homeowners find that once they live with their choice, it becomes the heart of the room, the one thing they’d never change.
Brick and Stone Finishes for Authentic Charm
Exposed brick or stacked stone behind a wood stove looks like it was meant to be there. Both materials handle heat without issue and age beautifully over time.
Full brick installation usually means removing existing drywall down to the framing, then laying brick in a running bond or herringbone pattern. This is not a weekend DIY job if done right, mortar joints must be consistent, and you’ll likely need a mason or experienced bricklayer. But, if your home already has a brick exterior or chimney, matching it inside creates seamless continuity.
Faux or thin brick veneer is the DIY-friendly alternative. Products like manufactured stone veneer or adhesive-backed brick panels require only surface prep (prime the drywall, follow manufacturer’s guidelines for adhesive) and careful placement. They’re lighter, cheaper, and easier to install than full masonry, though less authentic-looking close up. Brands like Eldorado Stone or Boral make convincing versions.
Stacked stone (real or manufactured) adds texture and visual weight. Dry-stacked finishes (no mortar joints) are trending and install faster than mortared work. The trade-off: dust settles in crevices, so plan on occasional vacuuming.
Brick and stone also hide imperfect walls. If your wall is slightly out of plumb or has minor cracks, texture masks those flaws, another reason these finishes work well over drywall.
Bold Paint Colors That Complement Your Stove
Paint is the fastest, cheapest way to transform an accent wall. Your choice should balance the stove’s visual weight and your room’s light.
Deep, Warm Hues for Cozy Ambiance
Charcoal, deep navy, forest green, and burgundy make wood stoves feel grounded and intentional. These colors absorb light, so the stove’s glow stands out more dramatically in the evening. They also hide dust and soot splatter better than lighter shades.
Before committing, paint a large sample (at least 2×3 feet) and observe it at different times of day. A color that looks moody and sophisticated in afternoon light might feel heavy at night under artificial lights. Conversely, some deep colors appear richer once your eyes adjust and the room has layered lighting (stove glow, lamps, natural light).
Prep is non-negotiable: sand the wall lightly, patch holes, apply primer (especially important over existing paint or stains), then two coats of quality paint. Cheap paint won’t hide the wall underneath and flakes faster. Expect to spend $40–80 per gallon for mid-range interior paint: premium brands run $80–120. A 5-gallon bucket covers roughly 250 square feet per coat, so measure your wall to calculate accurately.
Neutral Tones for Timeless Elegance
Warm grays, soft beiges, creams, and taupe create sophistication without drama. These shades let the stove and room architecture do the talking. They’re also forgiving: they work with any stove finish (black cast iron, steel, copper trim) and pair easily with furniture and artwork.
Neutral doesn’t mean boring. A warm gray with undertones of brown or taupe reads differently than a cool gray with blue undertones. Test samples on your wall over a few days before painting the whole thing. Lighting matters enormously: a neutral that’s perfect in a north-facing room might feel dingy in south-facing space with intense afternoon sun.
Neutrals are also an excellent choice if you’re selling your home soon. A bold accent wall can feel personal and risky to buyers: a sophisticated neutral backdrop appeals to more people and doesn’t require a repaint before showing.
Shiplap and Vertical Paneling
Shiplap (horizontal boards with interlocking edges) creates a casual, farmhouse aesthetic. Vertical paneling adds modern lines and can make a ceiling feel taller. Both are DIY-friendly compared to masonry or complex finishes.
Real shiplap is milled pine, oak, or other lumber (typically 1×6 or 1×8 nominal boards, with actual widths around 5.5″ or 7.5″). It’s pricey, $1–4 per linear foot, plus stain or paint, but ages beautifully. Install it horizontally using a brad nailer or finishing nails, staggering joints so they don’t align. Leave small gaps (roughly 1/8″) for seasonal wood movement: shiplap shrinks and swells with humidity.
Peel-and-stick shiplap or MDF (medium-density fiberboard) panels mimic the look at a fraction of the cost ($0.50–1.50 per linear foot) and install even faster. Trade-offs: they’re not real wood, won’t develop character over time, and can look plastic if cheap. Mid-range products from retailers like Wayfair or Lowes are acceptable: budget options look thin and hollow up close.
Vertical tongue-and-groove paneling (sometimes called beadboard) has a narrower profile than shiplap and runs floor to ceiling. It elongates the wall visually and works especially well in older homes or cottages. Paint it a light color for brightness or stain it for richness.
Before installing any paneling, insulate behind it if your wall is exterior or uninsulated. Also check local building codes, some jurisdictions require fire-rated materials in certain wall locations. Since your wood stove is a heat source, confirm that your paneling choice (especially wood products) meets clearance requirements from your stove manufacturer. Most stoves require 3–6 feet of clearance from combustible walls unless you install heat-resistant backing.
Wallpaper and Texture Options
Wallpaper behind a wood stove is bold, and surprisingly practical if you choose wisely. Heat and humidity fluctuate around a stove, so standard vinyl wallpaper can blister or peel. Opt for peel-and-stick wallpaper (removable and heat-tolerant) or vinyl-coated non-woven wallpaper, both rated for kitchens and high-moisture areas. Brands like Spoonflower, Walls Republic, and even IKEA make convincing patterns at reasonable prices ($15–50 per roll).
Geometric patterns, vintage florals, or faux-brick designs add personality without the commitment of paint or paneling. If a pattern feels dated in three years, wallpaper is easier to swap than repainting or refinishing. Just ensure your wall is smooth, clean, and primed before hanging, bumps and seams will telegraph through wallpaper.
Textured finishes (without wallpaper) like popcorn, knockdown, or orange-peel drywall compound add visual interest and hide wall imperfections. These finishes are inexpensive ($0.30–1.00 per square foot applied) but can trap dust and are harder to clean than smooth walls. They also feel dated in many homes now, so consider your design direction before committing.
Peel-and-stick tiles or panels designed to mimic subway tile, marble, or geometric patterns are trendy and install in minutes with no adhesive or grouting. Quality varies widely: cheaper versions look flat and plastic. Inspect samples in person before ordering, especially if you’re ordering online. Real customer reviews on YouTube or installation videos often reveal how finishes look under real lighting.
Temperature fluctuations around a stove can challenge any finish. If you’re using wallpaper or panels, ensure the wall surface is sealed and finished properly to prevent moisture infiltration or paint peeling underneath. Prime bare drywall with quality primer before applying wallpaper or adhesive-backed products, this prevents the drywall from absorbing moisture and causing adhesive failure.