A walkout basement patio is one of the most underutilized opportunities in home improvement, and the best chance to reclaim outdoor living space that most homeowners overlook. Unlike traditional decks perched above ground, a below deck walkout basement patio sits at grade level, offering direct access from your lower level and creating an extension of your home that feels seamlessly integrated with the landscape. Whether you’re working with a freshly finished basement or upgrading an existing foundation, turning that egress into a functional, beautiful outdoor retreat transforms how you use your property year-round. This guide walks through practical strategies to maximize natural light, create flow, and build zones that work whether it’s summer entertainment or a quiet autumn retreat.
Table of Contents
ToggleKey Takeaways
- A below deck walkout basement patio creates seamless indoor-outdoor living by ensuring a flush threshold transition with proper 2% drainage slope to prevent standing water and ice damage.
- Maximize natural light by installing egress windows (36×36 inches minimum) and sliding glass doors, plus widened light wells with reflective white interior panels to brighten the below-grade space.
- Design multi-functional zones for seating, dining, and quiet retreat using permeable pavers in alternating patterns, positioning seating near doors for winter warmth and shade structures for summer heat management.
- Choose durable, budget-friendly patio materials like permeable pavers ($8–$12 per sq. ft.) or concrete with stain and seal, laying them over 4-inch gravel bases to ensure proper drainage and longevity.
- Install hardwired LED uplights and warm white (2700K) string lights for safety and ambiance year-round, plus consider electric patio heaters to extend usable outdoor seasons into shoulder months.
- Support your below deck basement patio design with hardscaping like retaining walls, raised planter beds, and water features, combined with shade-loving plants like hostas and ferns to anchor the space and improve drainage.
Maximize Natural Light With Strategic Window Placement
Natural light makes or breaks a below-grade space. Before pouring concrete or laying pavers, evaluate your window placement and consider expanding it. Most building codes (IRC Section R310) require egress windows in all bedrooms and finished basements: if you’re expanding the patio area, you’ll want plenty of glass facing that direction.
Egress windows pull triple duty: they satisfy code, flood your basement interior with daylight, and frame views of your patio. Install them at least 36 inches wide and 36 inches tall, with a sill height no more than 48 inches above the finished floor. Rough openings run about 40 × 40 inches, so budget your foundation layout accordingly.
Sliding glass doors are the workhorse here. Vinyl or aluminum frame options both work: aluminum resists moisture better but costs more. A pair of 6-foot sliders opens the entire wall, while French door systems give you more control and a cleaner aesthetic if your basement footprint is tighter.
Light wells, those window-adjacent concrete pits, can feel claustrophobic if they’re too narrow. Widen them out and angle the sides toward the patio to bounce light down into the basement. Paint the interior white or install reflective panels: some folks add a small polycarbonate skylight cover to keep rain and debris out while maintaining light transmission.
Create a Seamless Indoor-Outdoor Flow
The transition from inside to outside can make or break the usability of your new space. Threshold details matter more than most DIYers realize. A flush transition, where the patio surface sits almost level with your interior floor, feels open and welcoming. This usually means your patio deck or paver surface is 3/4 inch to 1.5 inches below the interior floor elevation, accounting for door frame and drainage slope.
If your basement floor is 6 feet below the surrounding grade, you’ll need to excavate and slope the patio area down gradually. A 2% slope (roughly 1/4 inch per foot) is the minimum for water drainage without feeling steep. Many homeowners miss this step and end up with standing water or ice patches in winter.
Choose your patio material with drainage in mind. Permeable pavers over a gravel base allow water to percolate instead of pooling. Concrete with a broom finish and proper slope works too, but cracks will develop over time if frost heave pushes your foundation. Composite decking or pressure-treated deck boards are popular alternatives if you prefer a warmer, softer feel underfoot.
Force-back the interior finishes toward that threshold. Paint the basement wall a lighter color or use shiplap to visually connect the space. Install matching hardware on the glass doors: polished brass or matte black hinges and handles read “finished” rather than “emergency exit.” Your patio furniture, rugs, and decor should feel like an extension of your basement style, not an afterthought.
Design Multi-Functional Zones for Every Season
A 16-foot-by-20-foot patio can feel aimless if you don’t carve it into zones. Start with zones for entertaining, dining, and quiet retreat. Permeable pavers are ideal for defining these areas without hard visual breaks: you can lay them in alternating patterns or colors to suggest different uses.
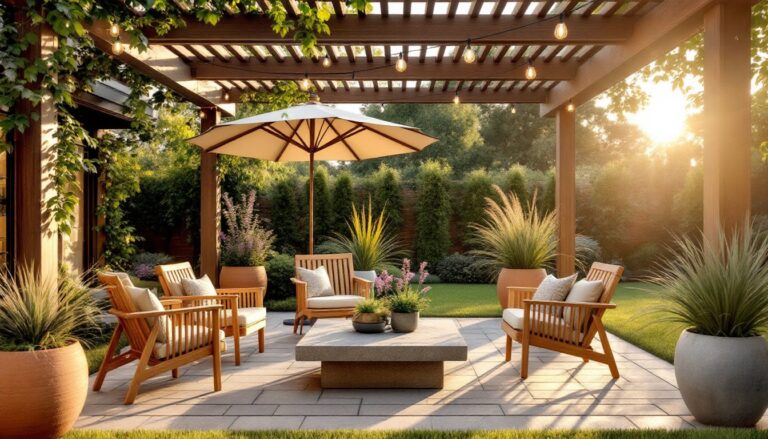
A seating zone near your doors stays active spring through fall and gets most of your foot traffic. Position it for afternoon shade, either from an awning or the shadow of your upper-deck structure if you have one. Furnish it with weather-resistant resin wicker or metal patio furniture that stands up to UV exposure and moisture.
For dining, a 4-foot-by-6-foot table comfortably seats four and leaves room to move around. Hardscaping like pavers gives you a stable, level surface for table legs. Most patio tables are built for outdoor use but will degrade faster in below-grade shade, so look for sealed wood or composite top options.
Create a quiet zone at the far corner or side, just 6 feet square, for a bench or lounge chair. This becomes your refuge. In cooler months, this zone might sit unused, but designing it now means you’re not stuck with an oversized single-use space.
Seasonal considerations matter. Winter darkness comes early, so orient your main seating toward your basement doors for maximum residual warmth and dusk light. In summer, that same orientation traps heat: an adjustable shade structure or umbrella becomes essential. Think of your patio as a four-season room, not just summer real estate.
Budget-Friendly Patio Materials and Finishing Touches
Material costs swing wildly based on region and availability. A 40-square-foot patio in pavers might run $400–$1,200 depending on whether you DIY installation or hire help. Concrete pours run cheaper per square foot but require professional finishing if you want texture and color.
Permeable pavers are the sweet spot for below-deck spaces: they cost $8–$12 per square foot installed, allow drainage, and feel finished. Lay them over a 4-inch gravel base and landscape fabric to prevent weeds. If budget tightens, a crushed-stone or mulch finish works for the first season while you save for permanent paving.
Lumber for deck boards or edging should be pressure-treated or composite to resist rot. Pressure-treated 2-by-6 or 2-by-8 joists cost $3–$6 per linear foot: composite costs double but lasts 25+ years with zero maintenance. Nominal 2-by-6 lumber is actually 1.5 by 5.5 inches, a fact that surprises many first-timers.
Finishing touches like potted plants, outdoor cushions, and accent lighting transform a bare patio into a room. A 100-foot spool of outdoor-rated string lights costs $40–$80 and instantly makes the space inviting. String lights also provide functional task lighting for evening entertaining.
Paint or stain your concrete if it’s bare. Concrete stain ($30–$50 per gallon, covers 150–300 sq. ft.) creates color and slip resistance. Sealed concrete lasts longer and shrugs off algae and mold, common in shaded basement areas. Budget $200–$400 for a professional seal, or DIY it for $80–$150 in materials and elbow grease.
Incorporate Hardscaping and Landscaping Elements
Hardscaping, the non-plant structural elements, anchors your patio and manages water. A small retaining wall at the patio edge defines the space and creates a planting bed for greenery. Use interlocking blocks or stacked stone: a 2-foot wall needs a concrete footing below frost line (typically 3–4 feet deep, but check your local building code). This isn’t optional if you’re creating elevation change.
Raised planter beds bring greenery closer to eye level and add vertical interest. Build them from composite materials or cedar: avoid pressure-treated lumber for vegetable beds but it’s fine for ornamental plantings. Fill with quality potting mix, not garden soil, to ensure drainage. Perennials like hostas and ferns thrive in basement patio shade: evergreen groundcover fills gaps and adds winter color.
A small water feature, a birdbath or recirculating fountain, adds sound and life to an otherwise quiet outdoor room. The gentle running water masks nearby traffic noise and makes the space feel larger. For a below-deck space, keep it modest and ensure electrical outlets are GFI-protected and rated for outdoor use.
You can explore inspiration from spaces like a walkout basement patio with upper-level deck styling that balances multiple levels and entertaining zones. Landscaping should anchor the hardscape and improve drainage. A 3–4-inch layer of mulch around plants insulates roots and breaks up large expanses of concrete.
Lighting and Ambiance: Making Your Patio Usable Year-Round
Below-deck patios lose natural light fast, so intentional lighting is non-negotiable. Recessed step lights in your foundation or patio edge ($15–$30 per fixture) guide movement and add safety. Solar path lights work in a pinch but don’t deliver enough brightness for evening entertaining.
Install hardwired LED uplights around plantings and corners: they’re low-voltage (12V transformers, $100–$150) and run off a GFI outlet. String lights overhead create ambient glow without harsh shadows. Dimmers let you adjust mood from bright (entertaining) to soft (retreat mode).
Deep patio overhangs trap cold air in winter, so heated options become attractive in shoulder seasons. A wall-mounted patio heater ($300–$800 for electric or propane) extends your comfortable outdoor window by weeks. Electric heaters are safer and require less maintenance than propane, though propane costs less per BTU. Check that your electrical panel has capacity for a 240V heater: don’t try to run one off an extension cord.
Color temperature matters. Warm white (2700K) lights make the space feel cozy: cool white (5000K) feels clinical. Opt for warm tones in your seating zone and cooler tones in task areas. Many homeowners find that resources like HGTV inspiration or Southern Living’s outdoor ideas provide practical lighting and ambiance examples that work for basement patios.
Coverage and drainage are your final check. A pergola or shade cloth over your seating area prevents algae and mold growth in humid below-deck conditions. Ensure gutters and downspouts direct water away from your foundation and patio. A poorly drained patio becomes a liability in spring thaw or heavy rain.
Conclusion
A below deck walkout basement patio transforms underused foundation space into a genuine outdoor room. Focus on natural light, seamless transitions, seasonal functionality, and thoughtful drainage, the basics that professionals don’t skip. Start with material research and a clear zone plan: the finish work (plants, lights, furnishings) comes later. Your patio will pay dividends in livability and property value, one step at a time.